Switching to solar power is an excellent investment for both your wallet and the environment. However, if you’re new to this technology, you may be wondering how solar panels are installed. In this comprehensive guide, we will walk you through every step of the process – from preparing for installation to maintaining your panels over time. By the end of this article, you’ll have a solid understanding of what’s required to install solar panels in your home or business.
Preparing for Solar Panel Installation
Before having solar panels installed on your roof, there are several steps you need to take to ensure a successful installation. Firstly, assess the site where the panels will be installed and make sure it’s suitable for solar energy. Secondly, determine the best placement of panels that would maximize their exposure to sunlight. Lastly, check for permits and regulations in your area before proceeding with the installation.
Maximizing sun exposure is key to a successful solar panel installation.
Once you have completed these initial steps, it’s time to prepare for the actual installation process. This involves making sure your roof is structurally sound enough to support solar panels and clearing any obstacles or debris from the area where they will be installed. Follow this guide carefully and seek professional assistance if needed so that you can enjoy all of the benefits of having solar panels installed on your property.
Assessing the Site
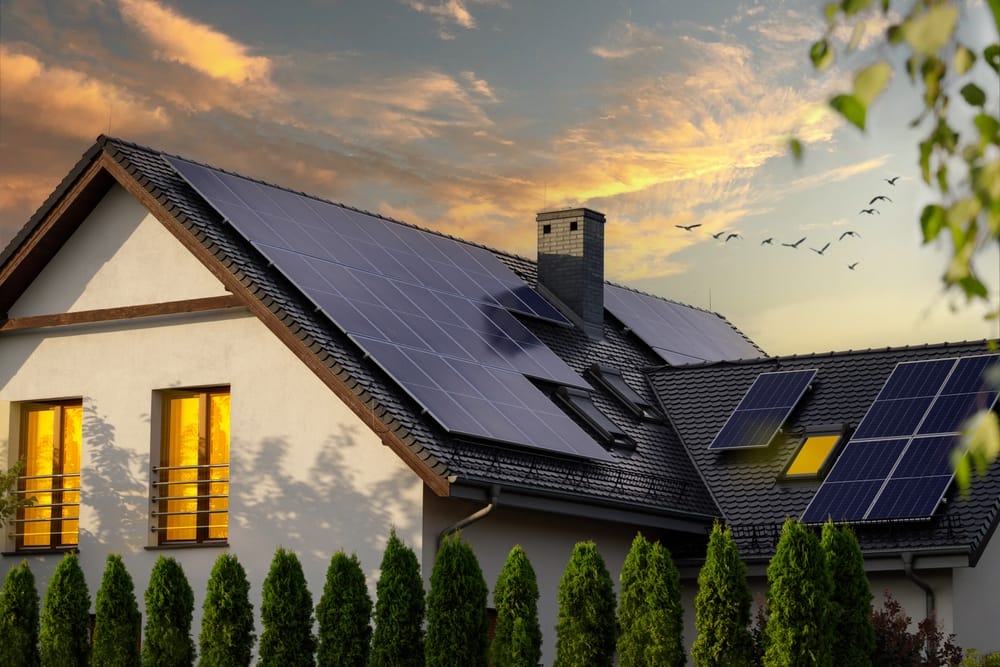
Evaluating the Roof’s Age and Condition is a crucial step when assessing your site for solar panel installation. The roof should be structurally sound and in good condition to ensure a successful installation. Before installing solar panels, it is important to inspect the roof for any damages such as leaks, cracks or missing shingles. Once you have determined that your roof can support solar panels, you need to consider if there are any Obstructions on the Roof that could impact its efficiency.
To ensure that your home is suitable for solar panel installation, Checking for Any Structural Issues with Your Home is also essential. You will need to assess whether your house has enough structural integrity to handle additional weight from the installed system without causing damage over time.
Assessing the Site Checklist:
- Check if there are any obstructions on the roof
- Inspect the age and condition of your roof
- Determine if there are any structural issues with your home
By following these steps before starting an Installation Project, you can ensure long-term success by mitigating future problems related to safety hazards or poor system performance due to shading effects caused by nearby trees and buildings.
Determining the Best Placement of Panels
Analyzing sunlight exposure throughout each day is a crucial step in determining the best placement of panels. By mapping out areas with maximum and minimum amounts of sun, you can optimize the number and positioning of solar panels for optimal energy absorption. Calculating optimal angles for solar panel tilt and orientation also plays an essential role in determining panel placement. Panels must face directly towards the sun to maximize their efficiency, which means factoring in latitude, seasons, and time of day.
Considering local climate conditions is another critical aspect when deciding where to place your solar installation. For instance, if there are trees or buildings that may block direct sunlight during certain hours, it’s necessary to adjust panel positioning accordingly. Factors like wind speed should also be considered when installing rooftop panels so they can withstand any harsh weather conditions that may occur over time. Ultimately careful consideration along with expert guidance will ensure an efficient installation process resulting in significant cost savings over time while minimizing environmental impact by generating clean power from renewable sources such as photovoltaic cells on rooftops or ground-mounted arrays!
Checking for Permits and Regulations
Before installing solar panels, it’s essential to research local building codes governing their installation. Ensure that your contractor adheres to these regulations to avoid any legal issues in the future. Applying for necessary permits or zoning variances is usually required before proceeding with solar panel installation.
Additionally, if you live in a HOA community, evaluate any rules that may restrict the installation of solar panels on your roof. Some HOA communities have specific guidelines concerning the placement and type of panels allowed. Make sure you comply with these regulations before having them installed. Stay up-to-date with existing permit requirements and zoning restrictions by consulting an expert guide on how solar panels are installed.
Installing the Solar Panels
To install solar panels, the first step is to mount them on a sturdy and reliable support structure. It’s important to ensure that the mounting system suits your specific roof type, as well as consider factors such as wind load and weight distribution. Proper installation of the mounting hardware will keep your panels secure in any weather conditions for years to come.
Once the panels are securely mounted, it’s time to wire them up and install an inverter. Wiring is a crucial part of the installation process that requires great attention to detail; even minor errors can lead to decreased efficiency or damage over time. The inverter converts DC power generated by your solar panels into AC power that can be used by your home or fed back into the grid. Installing both correctly sets you up for long-term success with clean energy production from solar power!
Mounting the Panels
Assessing the roof’s suitability for solar panel installation is crucial before mounting. The roof should be structurally sound and have enough space to accommodate the panels. Preparing the mounting brackets and rails involves measuring and marking where they will go on the roof, ensuring that they are level, straight, and secure.
Once everything is in place, it’s time to secure the panels onto the mounting system. This step involves carefully placing each panel onto its bracket or rail while ensuring that all electrical connections are properly secured. Once all panels are mounted securely, it’s important to check them again to ensure they’re perfectly aligned with one another so that they can work together efficiently as a unit.
Wiring and Inverter Installation
Laying out and connecting electrical wires from panels to inverter requires careful planning and attention to detail. The wiring must be properly sized, protected with conduit where necessary, and kept free of any obstructions that could cause damage or interfere with the system’s performance. When choosing an appropriate location for inverter placement, it is important to consider factors such as available space, ventilation requirements, and proximity to the electrical panel.
Connecting the inverter to the electrical panel is a critical step in completing a solar power installation. This involves running conduit from the inverter output circuits into an appropriately sized breaker within the main service panel. Proper labeling of all components is essential for future servicing needs. It is also recommended that a licensed electrician be consulted during this stage of installation for safety reasons.
Testing the System
When it comes to testing the system after solar panel installation, there are a few key things to keep in mind. First and foremost is ensuring that the voltage levels are correct using a multimeter. This helps ensure optimal performance and can catch any issues early on.
Another important step is running system diagnostics using manufacturer software. This will help identify any potential problems with the panels or inverters that may impact their longevity or efficiency.
Finally, conducting performance tests to ensure optimal output is crucial for long-term success of your solar energy setup. By following these steps, you can rest assured knowing your solar panels will provide reliable energy for years to come.
- Check voltage levels with a multimeter
- Run system diagnostics using manufacturer software
- Conduct performance tests to ensure optimal output
Connecting to the Grid
Applying for interconnection is the first step in connecting your solar panel system to the grid. This involves filling out an application and providing information such as electrical load, equipment specifications, and project location. It’s crucial to complete this process accurately and thoroughly to ensure a successful connection.
After applying for interconnection, completing a utility inspection is necessary before the final connection can be made. The inspection verifies that your solar panel system complies with safety regulations and meets local codes. Once passed, you can move forward with connecting your panels to the grid and start generating renewable energy for your home or business.
Applying for Interconnection
When applying for interconnection, it’s important to evaluate the available options. There are different types of interconnection agreements that may vary depending on your location and utility provider. Additionally, filling out and submitting the necessary paperwork can be a daunting task. It’s crucial to ensure that you have completed all required forms accurately and thoroughly.
To make sure everything runs smoothly during the process, coordinate with your solar installer. They will be able to guide you through any potential roadblocks or complications along the way. By working together, both parties can ensure a successful installation process and avoid any unnecessary delays or additional costs down the line.
Completing the Utility Inspection
Scheduling an inspection with your utility company is the first step in completing the utility inspection for solar panel installation. Make sure to contact your utility company well in advance and schedule the inspection at a convenient time that works for both parties. Before the scheduled date, be sure to prepare your electrical system for inspection by clearing any obstructions around equipment and ensuring access is granted to all necessary areas.
During the actual inspection, address any issues that arise promptly. Your inspector will provide you with feedback on what needs improvement or repair, so make sure you take note of everything they say. It’s important to address these issues as soon as possible so that installation can proceed smoothly without further delays or costs incurred from additional inspections. Remember: communication with your inspector can go a long way towards making this process seamless!
Maintaining Your Solar Panels
To maintain your solar panels and ensure their longevity, it is important to regularly clean them. Dirt, debris, and dust can accumulate on the panels’ surface and hinder their efficiency over time. Use a soft-bristled brush or a microfiber cloth to gently scrub away any buildup and avoid using abrasive materials that may scratch the surface.
Monitoring the performance of your solar panels is also crucial for maintenance purposes. Keeping track of their output levels will help you identify any issues early on before they become major problems. Utilize monitoring software provided by your installer or hire a professional to perform routine checks on the system’s overall health. By doing so, you can ensure that your solar panels are always functioning at peak capacity without any hiccups along the way.
Cleaning the Panels
Solar panels require regular cleaning to maintain their efficiency and longevity. Cleaning should be done at least twice a year, however, if you live in an area with heavy pollution or frequent dust storms, it may need to be cleaned more often.
To clean solar panels, you will need a soft-bristled brush or sponge, a bucket of soapy water (use mild detergent), and a squeegee for rinsing off the soap suds. Avoid using abrasive materials such as steel wool that can scratch the surface of your solar panels.
When cleaning solar panels make sure that they are turned off and not exposed to direct sunlight as this can cause damage. Use gloves and rubber-soled shoes when cleaning them for safety reasons.
Regularly monitoring the performance of your solar system is crucial in ensuring maximum efficiency and savings on energy bills. Performing routine maintenance checks like panel cleanliness can help identify any issues early before they become bigger problems requiring costly repairs in the future.
Monitoring Performance
Regularly monitoring the performance of your solar panels is crucial to ensure they are operating efficiently and producing maximum energy. Some important metrics to track include:
- Energy output: Monitoring the amount of energy your panels produce will help you identify any changes in their efficiency over time.
- Temperature: High temperatures can negatively impact a panel’s performance, so tracking temperature levels can help you determine if adjustments need to be made.
- Shading: Shade from nearby trees or buildings can also impact a panel’s performance, so monitoring shading patterns is important.
While regular maintenance tasks like cleaning panels and inspecting connections can often be done by the homeowner, it’s best to call in a professional when more complex repairs are needed such as replacing damaged parts or fixing wiring issues. A professional will have the expertise and tools necessary to safely make these repairs while ensuring that your system continues working at peak capacity.
Replacing Parts When Necessary
Over time, certain parts of a solar panel system may need replacing. This can include components such as the inverter or wiring, as well as individual panels themselves. One way to tell if it’s time to replace a part is by monitoring the performance of your system. If you notice a significant decrease in energy production or other issues, it may be time to inspect and replace any faulty components.
When replacing parts, it’s important to take proper safety precautions. Always turn off power sources and wear appropriate protective gear when working with electrical equipment. Additionally, follow manufacturer guidelines for removing and installing new parts to ensure proper function of your solar panel system. By regularly maintaining and replacing necessary parts, you can help maximize the lifespan and efficiency of your investment in renewable energy technology.
Summary
Regular maintenance and monitoring of your solar panel system can help ensure that it operates efficiently and continues producing maximum energy. Monitoring energy output, temperature, and shading patterns can help identify any changes in performance. Homeowners can perform basic maintenance tasks like cleaning panels and inspecting connections, but should call in a professional for more complex repairs or replacements. When replacing parts, proper safety precautions must be taken, and manufacturer guidelines should be followed. By maintaining and replacing necessary parts, you can help maximize the lifespan and efficiency of your solar panel investment. Find out why Source Solar has over 500 happy customers by scheduling your FREE Solar Estimate today!